The way out hikes

admin

Hikes near me: Bamford & Ladybower

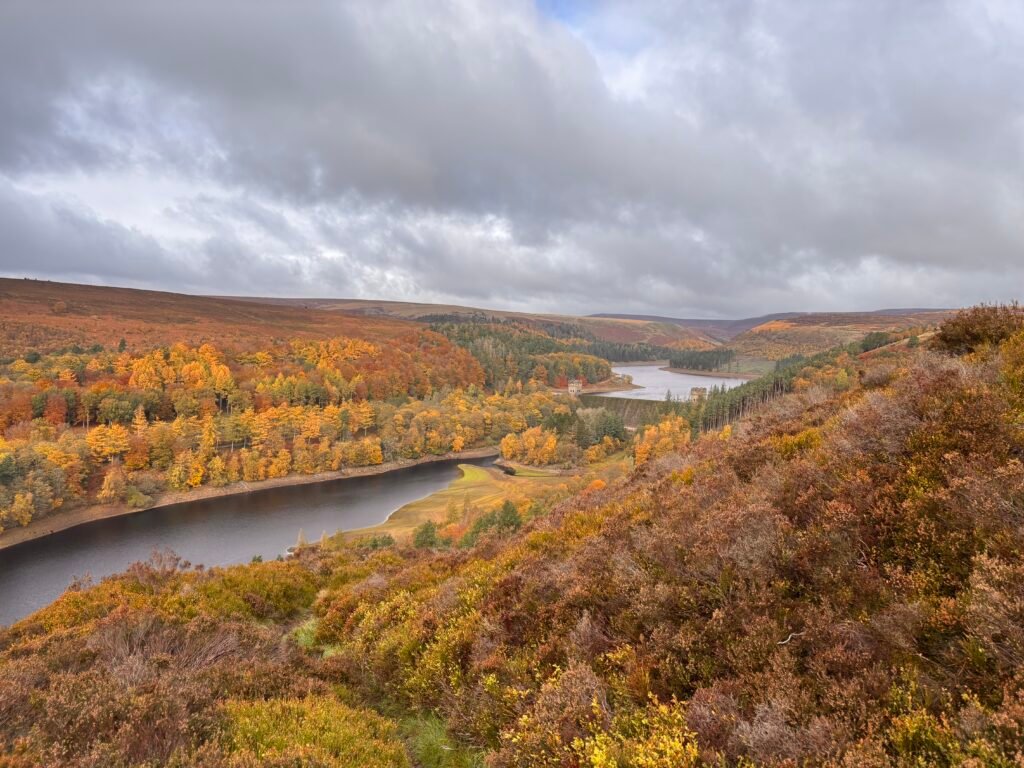
Hikes near me: Bamford & Ladybower 6.4 miles Distance Moderate Navigation burrito icon Burrito Challenge rating Route summary This hike combines gentle walking on well established paths with some more challenging moorland walking. The hike starts off gently with a walk along the east shore of Upper Derwent Reservoir. After this, you gain elevation and the great views over the Upper Derwent Valley open up.   Start and finish: Fairholmes car park Head NE towards the Derwent Dam from the car park. You will be on an unclassified road. As the road rounds a bend, look for a small footpath rising through a wooded area to your left (not the first trail path).   This path climbs gently to a bridleway. Turn left here and follow the track past the dam for approximately 3 km. The track is easy and this is a pretty walk on good ground.    You’re looking for a path on the right. If you reach a bridge, you’ve gone a little too far. You should see a very clear path. Take this and after around 40 yds look to the right of this, you should see a more faint path rising quite sharply through the trees in a southerly direction. This is the path you want.     After a short climb, you’ll go through a gate to enter the open access land. Continue rising diagonally. Continue SE with the boundary wall to your right. At around the km mark, you should cross a boundary wall. Continue on passing through another boundary wall.   Ignore the path you see to the left and continue SE past the cairns and through another boundary wall until you see a wide track heading off diagonally left and the outer corner of a field wall boundary.     Continue ahead on the track. You should have a small wooded area visible ahead of you slightly left. Enter the field to the right of this wooded area and take the path on the right to a gate.   Once through the gate, ignore the paths left and right and take the track forward with the boundary wall to your right.   This track will curve to the left and you’ll start to lose elevation. Follow the clear track down. Ignore when this track splits off to the left. Instead enter the field on your right and, keeping the wall to your left, handrail this to a gate.   Go through the gate and continue your descent back to the bridleway.   Turn right and head back towards the dam, where you can retrace your steps on the wooded path or take the steps down and return to the car park which has a takeaway cafe, picnic benches, and toilet facilities.

Hikes near me: Bamford & Ladybower Read More »

The Dragon’s Back: Y Grib

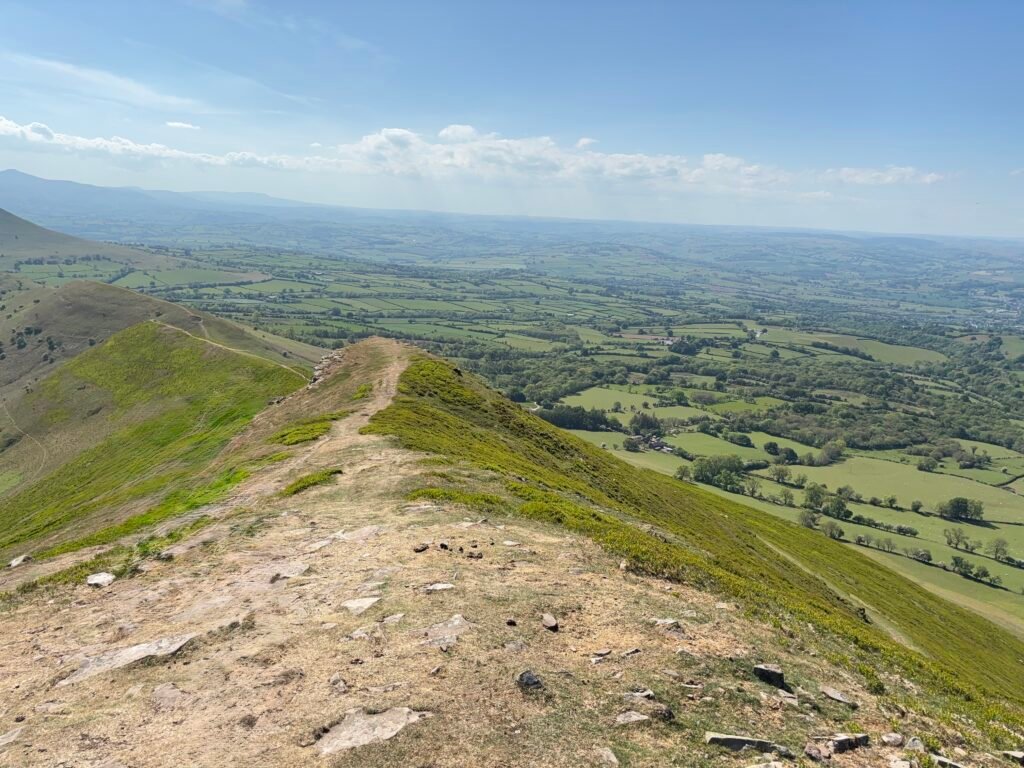
15.5 miles Distance Simple Navigation roast dinner icon Full roast Challenge rating Route summary A strenuous but satisfying full day of hiking with amazing views, wild horses and just enough of a ridge to make you feel that you’ve been brave.   Start and finish: Pengenffordd, Talgarth This route is an out and back rather than a true circular route, and it could be amended any way you like. It could be shortened significantly or a little to suit your legs or your time allowance. There is a great pub called the Dinas Castle Inn that serves food and there is some parking here (paid for).   If you parked at the pub, there is a track behind the pub that you can pick up heading for Castell Dinas remains.    Starting at Pengenffordd, the way is simple. Take the road off the A479 opposite Pengenffordd Farm (Three River’s Ride) . Ignore any stiles and paths off to your right and continue on the road until you reach the private track – take the stony track heading right here and follow this to the end. Go through the date and leave the Three River’s Ride now, taking the hillside track ahead. It’s a steep climb now so get your legs on.   Once you’ve caught your breath, hang a left and the route is very clear – just keep heading in this direction, enjoying the marvellous views all around. There’s still plenty of uphill to go before you’re done, and just enough ‘scrambling’ to make this section of the walk good fun. Technically a ‘ridge walk’ but Y Grib is wide and the drop off is not severe making this a great challenge for those who typically avoid this kind of hike.    When you meet the obvious path intersection, take the main path right to Waun Fach. At this point you could simply turn around and retrace your steps. Or, you can carry on in this direction to the next cairn at Pen Y Gadair Fawr, where yet again, you are rewarded with magnificent views of the Black Mountains.   After you’ve soaked up the views, it’s time to make your way back to the main interaction of paths where you turned right. Again, you could head back down the dragon’s back at this point…or, you can continue on, heading towards the wonderfully named Lord Heredord’s Knob (Twmpa) on the clear path.    Again, the sweeping views are just wonderful and keep an eye out for the wild horses that roam free up here. If you haven’t had lunch yet – there are some great spots here to rest your legs and have a bite.   Once you’ve soaked up the views – it really is time to retrace your steps I’m afraid – so back you go along that main path to pick up the path right back down the dragon’s back to Pengenffordd and depending on the time of day – maybe a meal at the Dinas Castle Inn ( At the very least a pint and a bag of crisps – trust me, you’ve earned it).

The Dragon’s Back: Y Grib Read More »

Bagged dog poop is not rock art

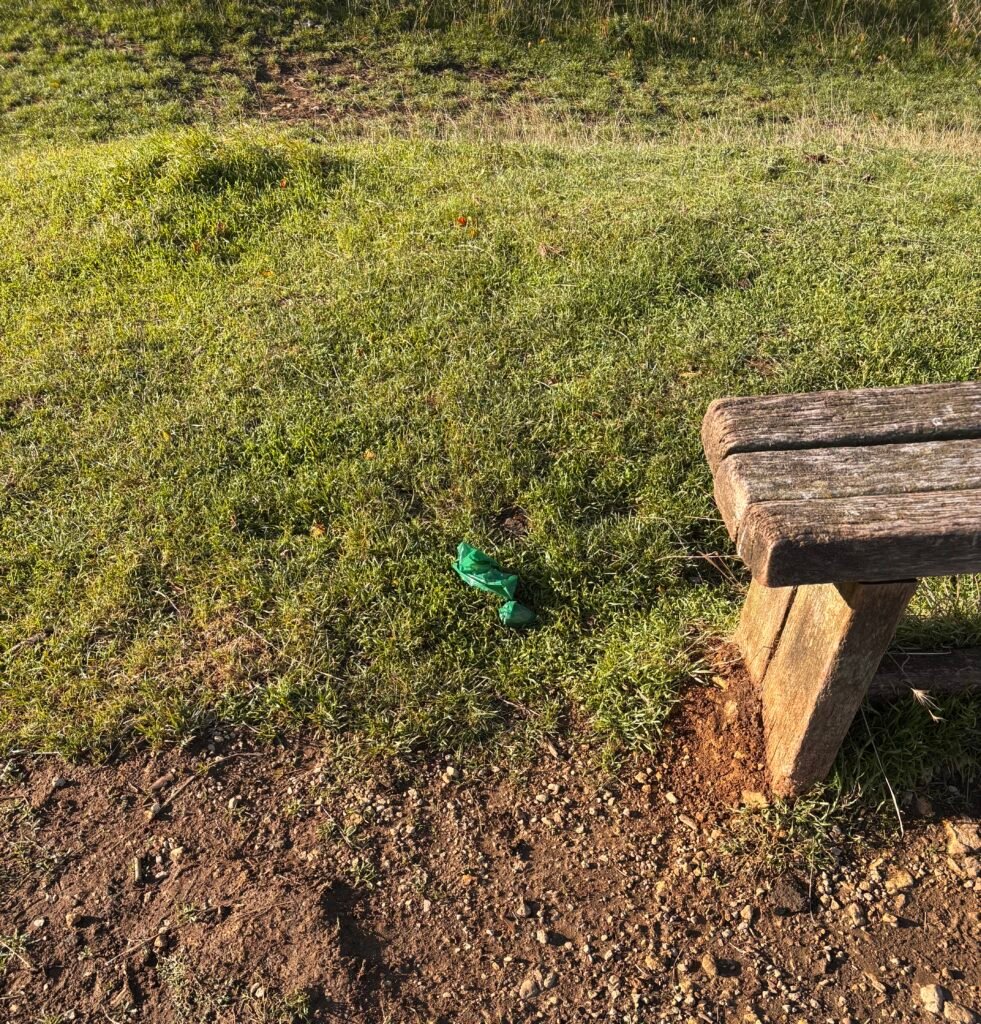
Bagged dog poop is not rock art Picture it.   You’ve got the gentle summer breeze on your face.   The folding hills are spread out before you. It’s like walking through a child’s painting of the perfect countryside scene.   The golden hue of the limestone path fringed by the vibrant green grass on either side. You make your way to the corner of the field – to the edge of the woods – where the wooden kissing gate is waiting for you.   You place your hand on the warmth of the wooden top bar and pull the gate towards you, stepping with your left leg and manouvering through the gate and there it is, glossy, catching the sun as it swings gently in the warm breeze at shoulder height.   Yes – its the ever more present poop bag tree decoration.   When I first encountered this strange trinket, I assumed that the person responsible had hung it here while they addressed an urgent bootlace issue and forgotten it – poor thing I thought – they’ll be morified when they realise.   Then I saw it again and thought – “Huh, I guess they are doing a circular or a quick out and back and I expect they will collect it up then and pop it in the bin”, strange I never saw another soul on that walk.   The third, fourth…etc time I saw it, I realised this was no lapse in memory, this was in fact the new phenomenon of countryside art using the medium of bagged dog poop.   Maybe the experts had issued new guidance I thought?   Nope, I seems that everyone is in agreement that bagged up dog poop left in a tree, at the edge of a path, or next to that bench you had your lunch at is 100% bad for everything and everything in the countryside.   I can only imagine that these people have very strange Christmas trees when it is the season but what you do in your own home is your business. But, out in the beauty of nature, I have only this to say about this…Stop it.

Bagged dog poop is not rock art Read More »

Our grading system explained

Are you a biscuit or a burrito kind of hiker? Our grading system explained. Our biscuit to full roast rating system…because easy, moderate, and challenging just aren’t enough fun.    Biscuit hikes So called because they are typically short and flat. They are for people who are inactive, new to walking, returning after a long break, or simply want a gentle outing.   Biscuit hikes are: Around 1–3 miles  Mostly flat or gently undulating Good, relatively even paths Around 30–90 minutes Little preparation required Easy to turn around or cut short A biscuit hike should leave you thinking: “That was nice. I could do that again.”   Croissant hikes Longer than a biscuit hike and with gentle curvature in the form of rolling hills. Croissant hikes are typically between 3 and 6 miles (5-10 km). The croissant is the next step up from a biscuit hike. You’ve moved beyond a quick stroll and are now committing a few hours to being outside.   Croissant hikes are: Around 3–6 miles Gentle to moderate hills Occasional steeper sections Roughly 2–3 hours depending on terrain and pace Require some basic preparation A little more stamina required A coffee-and-croissant stop would be entirely appropriate and at the end of a croissant hike you should be feeling like: “That was a proper walk — but I’ve still got plenty left in the tank.”   Burrito hikes The burrito is where hiking becomes a proper day out. You’re likely to be outside for several hours, and the route may involve significant hills, rough ground, or more challenging terrain and navigation.   Burrito hikes are: Around 6–8 miles, although distance isn’t the only factor Several hours on your feet Rolling hills through to significant climbs Rocky, muddy or uneven terrain A packed lunch or a lunch stop is called for  More water and equipment needed Greater attention to weather and navigation required This is where the distinction between walking and hiking starts to become less useful. You’re simply having a substantial outdoor adventure. The burrito is your lunch.   At the end of the day a burrito hike should feel like: “That was a big day — but a really good one.”   Full roast hikes  The full roast is the top end of the everyday hiking scale.It’s not necessarily reserved for elite athletes. Instead, it’s about substantial commitment and complexity.   Full roast hikes are: 8+ miles, potentially considerably more Full-day or multi-day adventures May involve significant elevation gain Steep ascents and descents Mountain or more technical terrain Potentially challenging weather Navigation becomes increasingly important More substantial equipment and preparation needed Potentially carrying everything you need for the day — or several days This could include a long mountain day, a demanding ridge walk, a major hillwalking route or a multi-day trek. You may question your life choices at certain points, but the feeling at the end of a full roast hike is: “I’m absolutely knackered. That was brilliant.”    And yes, ideally there is an actual roast dinner waiting at the end.   Remember, it’s just a bit of fun. One person’s croissant is another person’s burrito.

Our grading system explained Read More »

I’m an active person: Can I hike?

I’m an active person: Can I hike? You don’t have to be an athlete. You don’t need to spend every morning in the gym. Being active simply means that movement is already a regular part of your life.   You can generally climb several flights of stairs without thinking too much about it. You can keep walking for a reasonable amount of time without becoming exhausted, and physical activities such as lifting, carrying or moving things don’t leave you completely wiped out after a few minutes.   Perhaps you have a physically active job. Maybe you walk, run, cycle or swim regularly. You might play sports, go to fitness classes, or simply spend a lot of time on your feet. The good news is that an active lifestyle gives you a strong starting point for hiking.   The question is less about whether you can hike and more about how far, how high, and how technical you want to go.    Hiking places some very specific demands on your body, particularly when you’re dealing with steep climbs, uneven ground, long distances, and a backpack.   What kind of hike can you do if you’re already active?   You’re likely to feel completely at home on a 3 to 6-mile “croissant” hike. But you can probably start thinking bigger.   An active person may be comfortable tackling a 6 to 8-mile hike, potentially lasting most of the day, including routes with rocky or uneven terrain and some steeper climbs. This is what we call the “burrito hike”.   The burrito hike is a proper half to full day out. You’re potentially packing lunch, heading into the countryside or hills, and spending a good chunk of the day on your feet.   What does a “burrito” hike look like?    A 5-mile hill walk with several steep climbs A 6 or 7-mile route over rocky or uneven ground A longer moorland or mountain walk A full-day countryside hike with significant elevation A route involving repeated ascents and descents   Pushing yourself:    Option 1: Go longer If you’re already comfortable with 5 to 8 miles, one obvious way to challenge yourself is to increase the distance.   You could start exploring longer day hikes, perhaps gradually working towards 10 miles or more.   Option 2: Go higher Alternatively, keep the distance manageable and increase the amount of climbing.   A 6-mile route with significant elevation can be much more challenging than a flat 10-mile walk. Look for routes with bigger hills, longer climbs and more sustained ascents.   Option 3: Go more technical Once you’re comfortable with distance and elevation, you can start thinking about terrain. Look at incorporating some steep rocky sections, scrambling, river crossings, or more challenging navigation.   What about carrying a backpack? You’re probably walking for a good few hours, so your preparation becomes more important and you’ll definitely want to carry a backpack so that you can equip yourself with:   Plenty of water Food and snacks Extra clothing layers Waterproofs Map and compass A fully charged phone / power pack A small first-aid kit

I’m an active person: Can I hike? Read More »

I’m moderately active: can I hike?

I’m moderately active: can I hike? Moderately active people tend to get a reasonable amount of movement into their everyday lives.   You may not consider yourself particularly fit. But you might have a job that involves regular walking or standing rather than sitting at a desk all day. Perhaps you walk the dog, regularly go for casual walks, cycle occasionally, or do some light exercise during the week.   You might be comfortable walking several miles without too much trouble and climbing several flights of stairs without needing to stop.   At the same time, you might struggle with activities that require sustained high-intensity effort such as running for a long distance. And you may not feel particularly comfortable lifting and carrying heavy objects, and a steep hill could certainly get your heart pumping.   If you’re already moderately active, you’ve got a decent foundation for hiking. As a general starting point, you should be reasonably comfortable with a 3 to 6-mile (5–10km) hike, particularly if the route doesn’t have any steep climbs.   A biscuit walk probably isn’t going to satisfy you but a croissant hike” would suit you. It’s longer than the “biscuit  hike” and has some inclines, for example a 3 to 6-mile route with rolling hills and the occasional steeper climb should be within the capabilities of a moderately active person.   What does a “croissant” hike look like? A 3-mile countryside loop with gentle rolling hills A 4-mile woodland or moorland walk with a few short climbs A 5 to 6-mile circular route with one or two steeper sections. Pushing yourself: go longer or go steeper Once you’re comfortable with 3 to 5 miles, you’ve got two obvious ways to make your hikes more challenging. You can go further or you can go steeper.  You don’t necessarily need to do both at the same time.   Option 1: Increase your mileage If you’re comfortable walking 5 miles on rolling or relatively flat terrain, you could gradually increase your distance. Try 6 miles, eventually working towards 5 to 7 miles or beyond.   Increasing distance over relatively easy terrain allows you to stay on your feet for longer without adding a huge amount of additional climbing.   Option 2: Increase the hills Alternatively, keep your hike at around the same distance but make the terrain more challenging.   Instead of walking 5 relatively flat miles, look for a 5-mile route with a few steeper ascents and descents. This will help build the strength and endurance in your legs.   What about carrying a backpack? As your hikes get longer, you’ll probably start carrying more hiking gear.  You’ll definitely need to think about water, food, extra layers, and potentially navigation, a first-aid kit, and other gear like trekking poles.

I’m moderately active: can I hike? Read More »

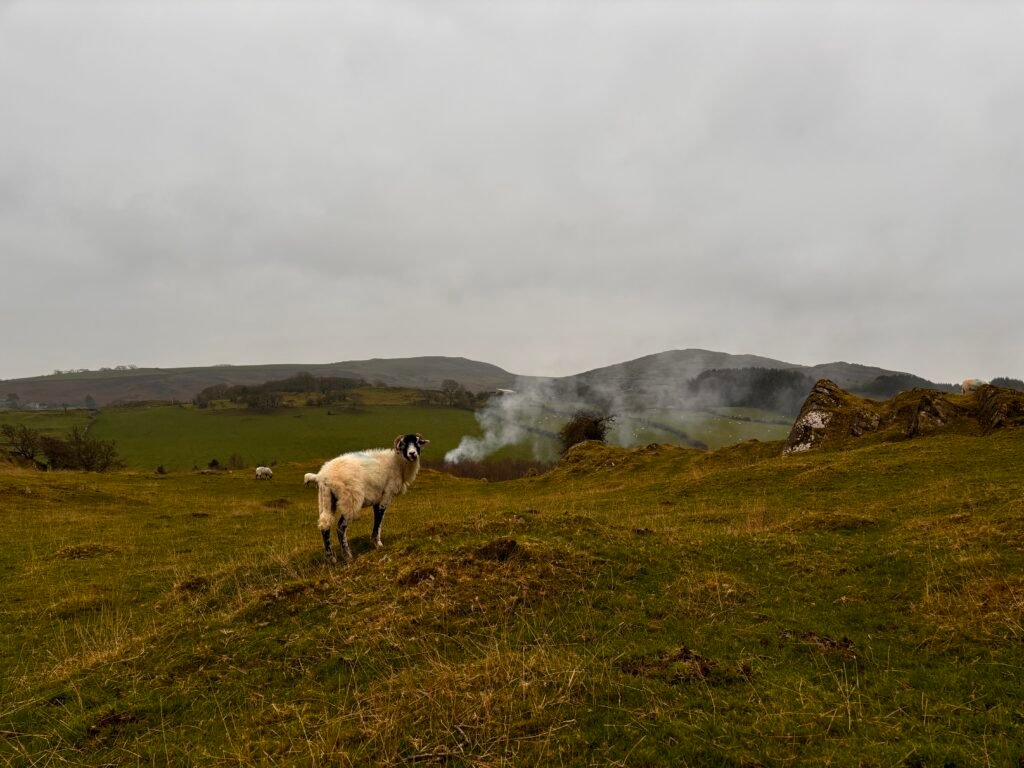
a sheep in a field

Hiking the Cumbria Way in 7 days

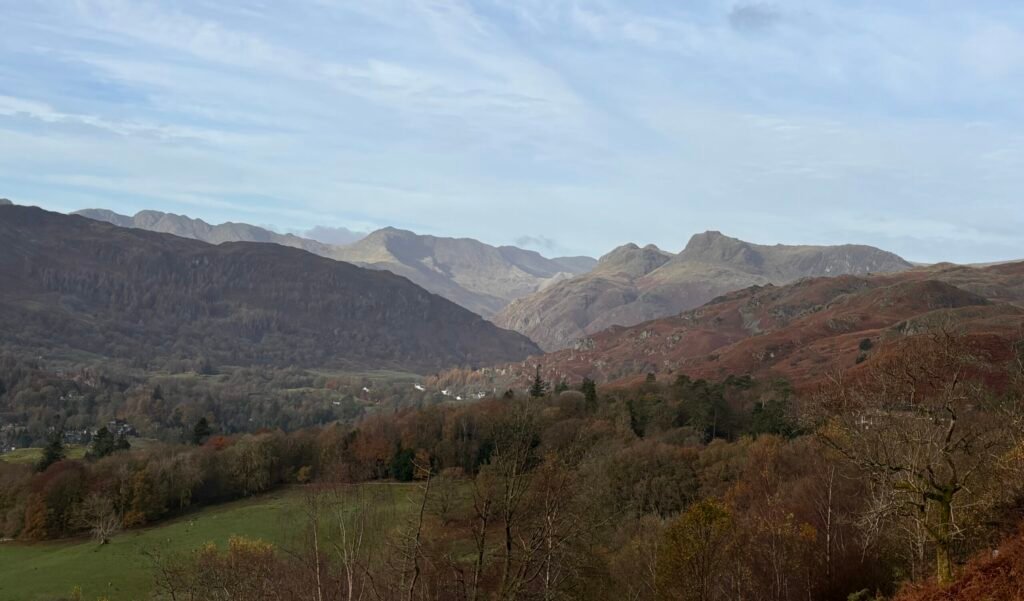
Hiking the Cumbria Way in 7 days 73 miles Distance Moderate Navigation roast dinner icon Full roast Challenge rating While there are some stages of the Cumbria Way that really cannot be shortened, it is possible to take a more leisurely pace on others. Hiking the Cumbria Way over 7 days can make for a wonderfully relaxed week of hiking in some spectacular scenery.    Navigation on the route is described at moderate as much of the route is well way-marked and straightforward. However, some sections, in particular stage one can be more challenging. This itinerary is based on the regular Cumbria Way route. Other routes are available, such as the mountain route and stage six in particular has an official foul weather alternative route option.    Most of us that love hiking rarely just hike on through without pausing to take pictures or admire the view, so as with any distances, it’s important to factor this as well as a missed turn buffer into plans.    Other factors are terrain and ascent. A 6-mile day might seem light, but when you factor in steep ascents and descents over uneven rocky ground, often it’s enough. 7-day itinerary Day One: Ulverston to Coniston (15.5 miles) Day Two: Coniston to Skelwith Bridge (6.3 miles) Day Three: Skelwith Bridge to Great Langdale (5.5 miles) Day Four: Great Langdale to Stonethwaite (7.3 miles) Day Five: Stonethwaite to Keswick (9.3 miles) Day Six: Keswick to Caldbeck (14.5 miles) Day Seven: Caldbeck to Carlisle (15.5 miles) The Cumbria Way starts at The Gill in Ulverston and day one’s hiking is through farms and fields, and over moorlands.  Depending on the time of year, this stretch of the route can be very quiet. That’s worth considering if you are hiking alone.   Navigation is mostly straightforward, but some signage can be a bit elusive, especially in the section between Newbiggen and Beacon Tarn. The final stretch of the day follows Coniston Water into the village of Coniston in the shadow of the Old Man for your first overnight stop.   Day two starts with a steep climb out of Coniston but on the whole is a gentler hike. Official route books have you walk to Great Langdale, but on this itinerary, you will stop at Skelwith Bridge. This gives you the freedom to really take your time today, in contrast to yesterday’s walking.   You’ll walk via Tarn Hows, you can take a detour to Colwith Force if you want to and once you hit Skelwith, you also have the opportunity to go take a look at Skelwith Force.  Heck, if you really have too much energy left at the end of the day – you can even hoof it up the lane behind the Skelwith Bridge Hotel to get a view of Loughrigg Tarn.   Day three is another easy-going day.  You can take your time over breakfast – there is no rush today and there are plently of places to stop for lunch on route today also, so no need to pack a lunch unless you really want to. If you’re an early bird, you could hoof it up to catch the sunrise over Loughrigg Tarn.   Leaving Skelwith, you follow the Cumbria Way first to Elterwater, then Chapel Stile, and onto Great Langdale. Today is the day you start to see some truly wonderful scenery as you approach Great Langdale.   After a restful night at Great Langdale, which has several accommodation options – pick up the Cumbria Way again behind Old Dungeon Ghyll.     Today is a fantastic day’s walking if the weather is good.  If the weather is bad – well, that’s a different story and if the weather is really foul with significant rainfall – you might want to consider how committed you really are to hiking this day because on a good day, you will cross streams. On a bad day – you will be wading through them. Don’t say you weren’t warned!   The day itself is not especially long, but it is quite tiring with the steep ascent and descent of Stake Pass to negotiate.  You can overnight in Stonethwaite or Rosthwaite.     Day five takes you through the spectacularly mossy greens of Borrowdale and follows the left shore of  Derwentwater all the way to Keswick.   You could easily be in Keswick for lunch if you head out early and today’s walking is pretty gentle. You can deviate from the path of course and join the throngs climbing Catbells. Or, you can take it easy, stop off at Lingholm for a leisurely lunch and then enjoy some time in Keswick, which has an abundance of shops, pubs, and restaurants; not to mention the largest pencil in the world.    Day six is a long hike and it starts with a steep climb out towards Latrigg.  The walking today is sublime though – particularly if the weather is good.    You’ll have lovely views of Blencathra on your right syou head towards Skiddaw House, which is a great place to stop for a break. There is an honesty kitchen here, where  (at the time of writing) you can make yourself a proper cuppa – and if the weather is bad or cold – you should definitely take advantage of this cosy option and warm up before the next stretch.    You’ll have a choice to make at this point. Follow the foul weather route left if it’s bad, or, if it’s fine, continue on the regular route right.      You will come to a left turn over a footbridge and will reach the old mines – you should be able to see the Lingy hut high up on the hill. You are heading towards this.   After the mines, the going gets much more rocky underfoot and the path can be difficult to keep track of. Just for fun – this is where you will encounter peat hags as well.    After the Lingy hut, you’ll

Hiking the Cumbria Way in 7 days Read More »

Weekend hikes: Bakewell and Chrome Hill

Bakewell & Chrome Hill What’s more enjoyable than a weekend escape that combines great hiking, great beer, and a few choice shops to spoil yourself with some new outdoor wear?    One of our top picks is a weekend that combines an overnight in Bakewell, Derbyshire with a super exciting scramble on Chrome Hill. You can arrive on day one and stretch your legs with an easy few hours on the Monsal Trail, fit in a bit of gear shopping in town, and spend a pleasant evening in Bakewell before getting some serious hiking in on day two.   Day one – Bakewell and The Monsal Trail   After arriving in Bakewell, find your way to the Monsal Trail which you can pick up at Station Road. The Monsal Trail is an 8.5 mile, fully accessible trail that follows the old railway line.   There’s no need for any complex navigation – just follow the trail as far as you feel like, remembering that you have to get back to Bakewell at some point.   It’s a pleasant, easy-going walk with refreshments and facilities along the way. It serves as a nice warm up to stretch the leg muscles and get you ready for something a little heartier on day two.    Day two – Parkhouse and Chrome hill   After a good night’s sleep, head over Earn Sterndale by car or take a bus and follow the signed path to Parkhouse Hill.   You have a choice here. You can stick to the low route (recommended if the weather is bad or icy) and head right around Parkhouse hill, or…. you can go up and over.    The steep route up will fill your lungs and you’ll have some scrambling to do to get over and back down the other side. Nothing too bonkers, but hands-on for sure and the descent is more challenging than the ascent. The views are great and it’s an exciting hike.   Next up is Chrome Hill, where again – you can tackle the short ridge or you can stay low and avoid it. It all depends on the weather (stay safe) and how you feel about exposed ridges.    If you have limited time, you can turn around after Chrome hill and make your way back – if you have a bit more leisure time (and a map), you can extend your walk heading out towards Stoop Farm, creating a circular route that takes you through Hollinsclough.

Weekend hikes: Bakewell and Chrome Hill Read More »

3 Days in the Lake District: A Challenging Hike from Ulverston to Bowness-on-Windermere

30 miles Distance Moderate Navigation roast dinner icon Full roast Challenge rating Route summary A three-day Lake District adventure via Coniston, Skelwith Bridge and Loughrigg Fell   For the adventurous — and those who don’t mind muddy boots.   Fancy three days of proper walking in the Lake District? This point-to-point adventure takes you from Ulverston to Coniston, on to Skelwith Bridge and over Loughrigg Fell to Ambleside, before finishing with a ferry ride across Windermere to Bowness-on-Windermere.   Expect beautiful scenery, quiet stretches of countryside, challenging terrain and plenty of reasons to stop for a snack. You’ll also encounter stiles, muddy paths and the occasional climb that makes you question your life choices — briefly, of course.   This is a challenging multi-day hike, best suited to walkers who are comfortable with long days on varied terrain and confident navigating independently. Good preparation is essential, but the rewards are well worth the effort.   One of the best things about this route is that you don’t have to walk every last mile. You’ll follow sections of the Cumbria Way before finishing on the water, making this a lovely combination of walking, scenery and a little time to put your feet up.   Just don’t expect three days of gentle lakeside strolls. This is the Lake District, after all! Before You Set Off Is This Hike for You? This is a challenging three-day adventure that requires a good level of fitness, confident navigation and a willingness to tackle uneven, rocky and sometimes boggy terrain. It’s rewarding, but it’s not the route to choose if you’re looking for a gentle introduction to multi-day hiking.   Plan Your Arrival Day One is a long walk. If you’re travelling a fair distance to Ulverston, arriving the day before is well worth considering. It gives you time to settle in, get a good night’s sleep and start the first walking day feeling refreshed rather than already in need of a sit-down.   If you’re local and can easily reach the start of the route, you may not need to stay overnight.   Check the Daylight The time of year matters. In autumn and winter, shorter daylight hours can make a long walking day more challenging. Plan an early start, check sunset times and carry a headtorch. If you’re walking after the clocks go back, aim to be ready to set off by 8 am.   Pack for the Lakes Rain in the Lake District? Surely not! Joking aside, wet weather can turn paths muddy and leave peat bogs particularly soggy. Proper walking boots with good grip and ankle support, waterproof clothing and enough food and water are essential. There are no refreshment stops on Day One, so you’ll need to carry what you need.   Take a Map Much of this route follows the Cumbria Way, so the Harvey Maps Cumbria Way map could be a useful addition to your kit. It’s designed specifically for the trail and is waterproof, which is always welcome in the Lakes. And who knows? You might enjoy it enough to come back and walk the rest of the route. Day Zero – Arrival in Ulverston Where to stay in Ulverston You may find cheaper accommodation on the outskirts of town, but remember that every extra mile you walk before the official route even begins is a mile you didn’t need to do! The closer you are to the start of the route, the easier your day will be tomorrow and there is some accommodation right by the official start of the route.   What to do in Ulverston For something to do before your adventure begins, we’d head straight to the Laurel and Hardy Museum. Trust me when I say there’s no place quite like it — and it’s a wonderfully quirky way to start your Lake District trip.   Day One – Ulverston to Coniston via the Cumbria Way Ready to stretch those legs? Day One takes you from Ulverston to Coniston along the Cumbria Way, and it’s quite an introduction to your three-day adventure. Expect peaceful countryside, plenty of stiles, some tricky terrain and a few moments when you might wonder just how much further there is to go! It’s a beautiful route, but don’t underestimate it. A little preparation will go a long way towards making sure you finish the day with a smile on your face (and enough energy left to find the pub).   What to Expect Along the Way   A few farmyard friends The first half of the route takes you through farmland, so don’t be surprised if you find yourself sharing the path with some curious cows or sheep. Be respectful of livestock, follow any field signs and remember to leave gates as you find them. The animals live here, after all — you’re just passing through!   Peace, quiet and plenty of your own company Depending on the time of year, you might not see another soul for quite some time. You may not encounter many other walkers until you get closer to Beacon Tarn, so enjoy the peace and quiet. Think of it as a chance to switch off, soak up the scenery and have a good chat with yourself if you fancy it!   Stiles, stones, and squelchy bits There are plenty of stiles to negotiate on this route, so get ready for a day of climbing over things rather than simply walking around them. The terrain is varied, with uneven, rocky paths and some marshy ground around Beacon Tarn. After wet weather, things can get particularly muddy underfoot.   Good walking boots with ankle support and decent grip are strongly recommended. Your favourite trainers might look the part, but this probably isn’t their moment to shine. Navigation can also be tricky in places, so keep checking your position as you go. Even experienced walkers can get caught out when the path becomes less obvious.   The Coniston Water tease When you spot the sign for

3 Days in the Lake District: A Challenging Hike from Ulverston to Bowness-on-Windermere Read More »